Here, we’ve put together a quick guide on how to build a deck on a slope to give you an overview of what to expect if you’re planning on building a deck on slope.
The great thing about building a deck is you can pretty much place it on any surface! You can build a deck to help even out your space, or to make sloping parts of your garden accessible. Taking on this kind of project can be an attractive way to enhance your space and may also increase your property’s value.
Make a plan
Whatever you’ve got planned for your sloping decking project, we recommend you take some time to plan your project.
The first step is to decide where you’ll ideally want your new deck. We recommend you use stakes and string to plot out your working area. It’s a good idea to plan your deck by making it the same length as the decking boards if at all possible — this way you can minimise cutting things to size! Be sure to allow for a 5-8mm gap between boards for expansion during periods of extreme weather.
You may also want to measure the height of the slope so you can accurately begin planning any stairs or steps.
Prepare the decking area
So now how to build a deck on a slope. Before you begin building your deck you’ll first need to clear the area. That means removing the top layer of grass, foliage, and soil in the area you’ve marked for your new deck.
Be sure to dig to at least 50mm deep across the whole surface. Once you’ve completed that you’ll need to mark where your posts will go and dig those holes. Put your posts in and using a level make sure they are completely vertical. Now, you’re ready to set them! Use the concrete instructions to secure your decking posts.
Build the frame
Once your posts have been set following the manufacturer’s instructions, it’s time to put in the centre point posts. Put them dead centre in between your existing corner posts. Dig a hole and put a concrete block into the hole — but don’t put any posts in… yet!
We always recommend you start building the frame at the highest point of the deck. This way you’ll always know what height it’s at and not be worrying about if it’s level!
From here you can start to build and screw in a temporary frame. Be sure to include a slight slope for rainwater on your deck – it’s typically a 2mm fall for every metre of decking.
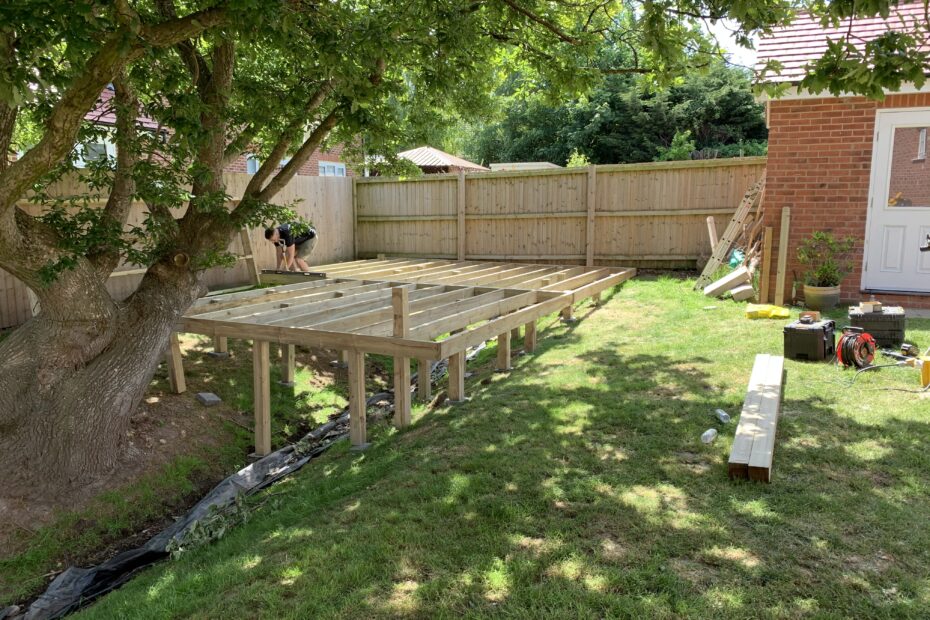
Add joists
After you’ve built the exterior frame you’ll be able to start adding in the joists. This next step requires a lot of measuring! Be sure to put in your joists down the centre of your deck for the maximum amount support. Once you’ve completed your centre joist you can then measure the length inside and then cut all your joists to match.
Next, you’ll need to find the centre point of the area that needs long joists (that you’ve already cut) and mark it. From there you’ll need to measure out in 400mm intervals all along that side — do the same for either side of the centre joist.
Fix the metal joist hanger to one side of your first joist, and screw it into the wood. Once it’s secure, then you can proceed with hanging it to the frame. Take care to follow your marked guides as you put in all of the joists.
Build your steps
Next you’ll want to build your steps! You might be wondering why you need to do this before you install your decking boards — this is because you’ll need to secure the step stringers to the exterior frame.
When you secure stringers to your decking frame, be sure they aren’t more than 450mm apart. If you’re making a wide staircase you may need to use three or four stringers to ensure your frame and stairs are secure.
Lay your decking boards
The last step in building your deck is laying the decking boards. Remember to pre-drill of your screw holes to prevent damage or splitting the boards. On the first board, screw in one side first, and then the other. Ensure you lay it straight, as this will be the guide for all other boards!
When you lay the second board be sure to include your expansion gap of around 5mm between each board. We recommend using a spacer or extra piece of wood to slide down between the boards to ensure it’s even. Then simply continue the process until your deck is complete. Although we advise expansion gaps, this is to your discretion.
Obviously, there’s other steps you can take after you lay the boards, including hanging fascia boards or securing a railing. It’s also worth mentioning that if your decking project has to be built more than 30cm above ground or if the decking platforms will cover more than 50% of the garden you’ll need to get planning permission!
There are many advantages to adding a decking to level out a slope including the fact it may add value to your home and give you access to an otherwise unused area of your deck. This is in our opinion the best plan of how to build a deck on a slope
For a free quote for please contact us here
Make sure to follow us on our social media to keep up to date with recent work and discounts we might offer.